Build & Deploy Series | Part-6 | Build and Deploy of React Application in Kubernetes using Jenkins hosted on AWS EC2
We recommend access the blog through your laptop/Computer for better
visibility.The coloured texts are links that can help you navigate to
particular topic and each code snippet has copy button appears when
hovered, This blog particularly designed with screenshots to help you
practise and gain confidence on DevOps world
What Can you expect from Blog:
- Introduction and Installation of Jenkins
- Configuration of Jenkins
- How to Setup Pipeline from Github SCM Jenkins file
- How to make connections from Jenkins Server Using SSH
- How to use Github Webhook to automate Deployment
Configuration to be used for this project:
This can be done with existing setup of your resources from Previous Projects
Image: Ubuntu Server 24.04
Type: t3.medium
cost charges may incur using t3 medium, so make sure to stop once project is done
#Note: AWS Free Tier is only for 750 Hours per year, so make sure you stop instance once you are done with the project
Image: Ubuntu Server 24.04
Type: t3.medium
Jenkins is most popular CI/CD tool that is used to setup pipelines, these pipelines help us in building and deploying with just a click
We will set up a pipeline to our project in such a way that any commit or code changes will deploy into our website directly
Let us take a new AWS EC2 Server and configure jenkins on it
Lets install Jenkins from its official documentation
Before we install jenkins, install Java
sudo apt update
sudo apt install fontconfig openjdk-17-jre
java -version
Now lets install jenkins
sudo wget -O /usr/share/keyrings/jenkins-keyring.asc \
  https://pkg.jenkins.io/debian-stable/jenkins.io-2023.key
echo "deb [signed-by=/usr/share/keyrings/jenkins-keyring.asc]" \
  https://pkg.jenkins.io/debian-stable binary/ | sudo tee \
  /etc/apt/sources.list.d/jenkins.list > /dev/null
sudo apt-get update
sudo apt-get install jenkins
Verify Jenkins installation by command
jenkins --versionis up , also start jenkins and check status of jenkins
sudo systemctl enable jenkins
sudo systemctl start jenkins
sudo systemctl status jenkins
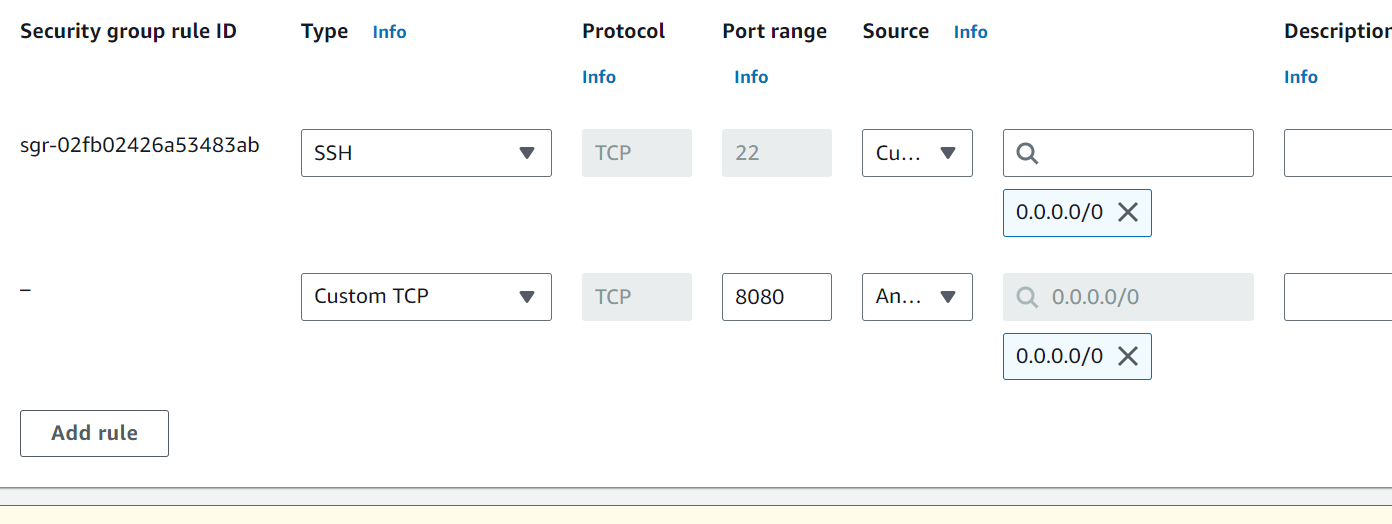
Add 8080 to inbound rules of AWSEC2 server in which jenkins is
running
sudo cat /var/lib/jenkins/secrets/initialAdminPassword
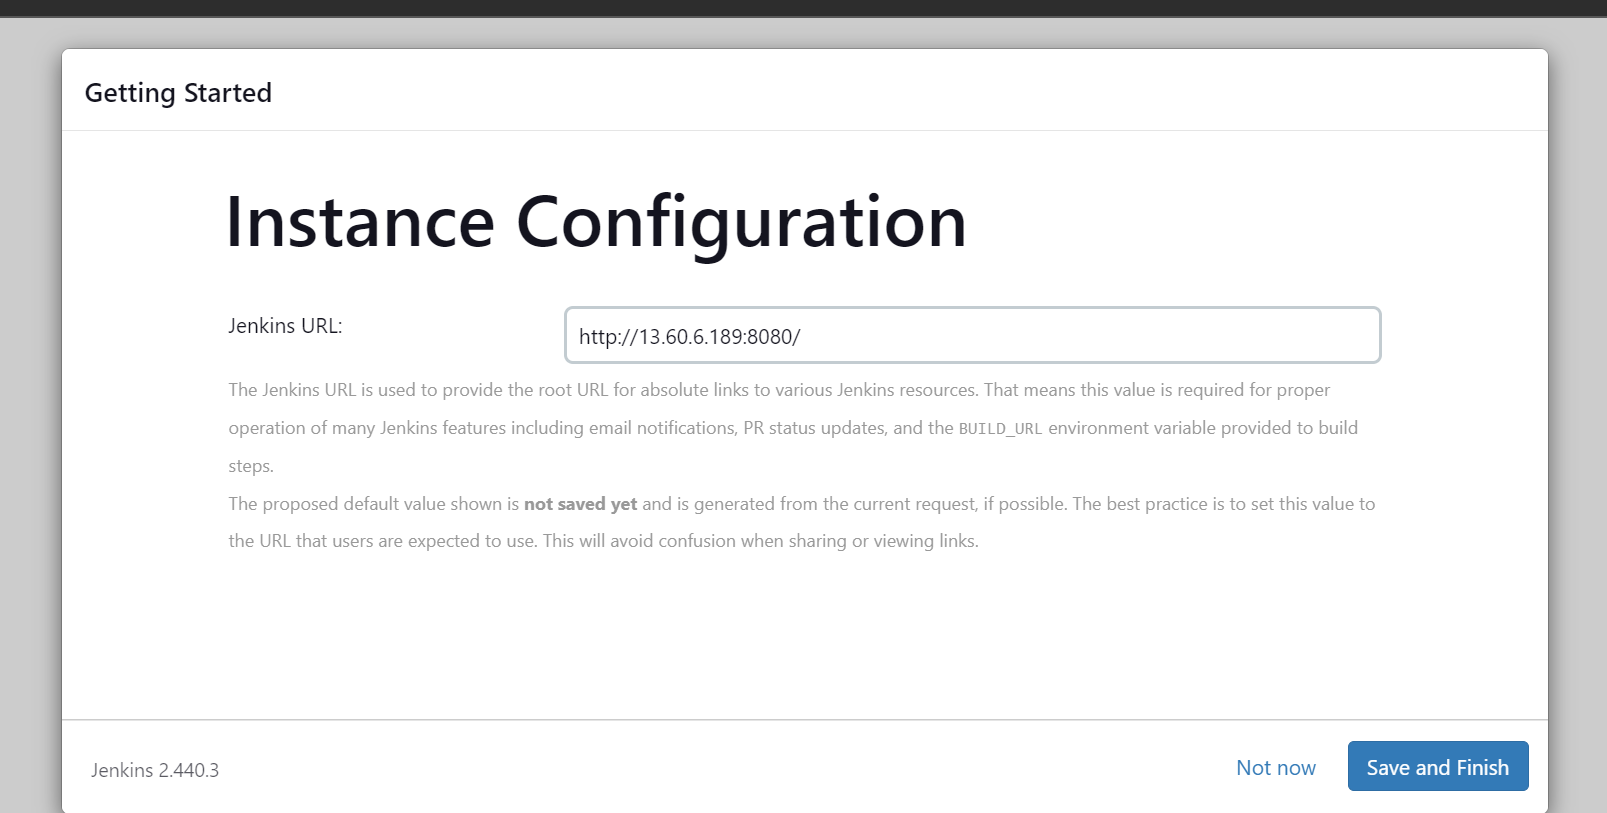
since our public Ip changes, everytime as we are not using AWS elastic
IP, i will be skipping this step
Our final page after configuration
you can login with First admin user created or you can give username as
admin and password is the password fetched from /var/lib/jenkins/secrets/initialAdminPassword when we initially logged
in
Now lets make a connection between JenkinsServer and BuildServer,so we
can ask Jenkins to run ansible playbooks that are inside BuildServer
We will switch to Jenkins user and generate key-pair
sudo su - jenkinsssh-keygen
sudo vi /home/ubuntu/.ssh/authorized_keysssh ubuntu@{BuildServer_Private_IP}exit
Build and Deploy of React Application
since we established connection, let us write our Jenkinsfile
first
You can use the repo here instead
git clone https://github.com/sagarkakkalasworld/Day6pipeline {
agent any
stages {
stage('Build Docker images on Build Server') {
steps {
script {
// Execute Ansible playbook on Build Server
sh "ssh ubuntu@172.31.42.119 'ansible-playbook /home/ubuntu/build.yaml'" // 'ansible-playbook /home/ubuntu/playbook.yaml'"
}
}
}
stage('Deploy Script on Deploy Server') {
steps {
script {
// Execute deployment playbook on Deploy Server
sh "ssh ubuntu@172.31.42.119 'ansible-playbook /home/ubuntu/deploy.yaml'"
}
}
}
}
}
In the above jenkins file, agent- any is where we are asking jenkins
to run on any nodes that are available. since we have not configured any nodes, these pipelines
will run on master jenkins server. ".sh" indicates shell and command followed by it indicates jenkins to
login to buildserver and run playbook build.yaml in stage-1 and run playbook deploy.yaml in
stage-2, the IP mentioned is Private IP address of Build Server
Now, lets include this file in the Github react project in which we
want to deploy
name it as Jenkinsfile
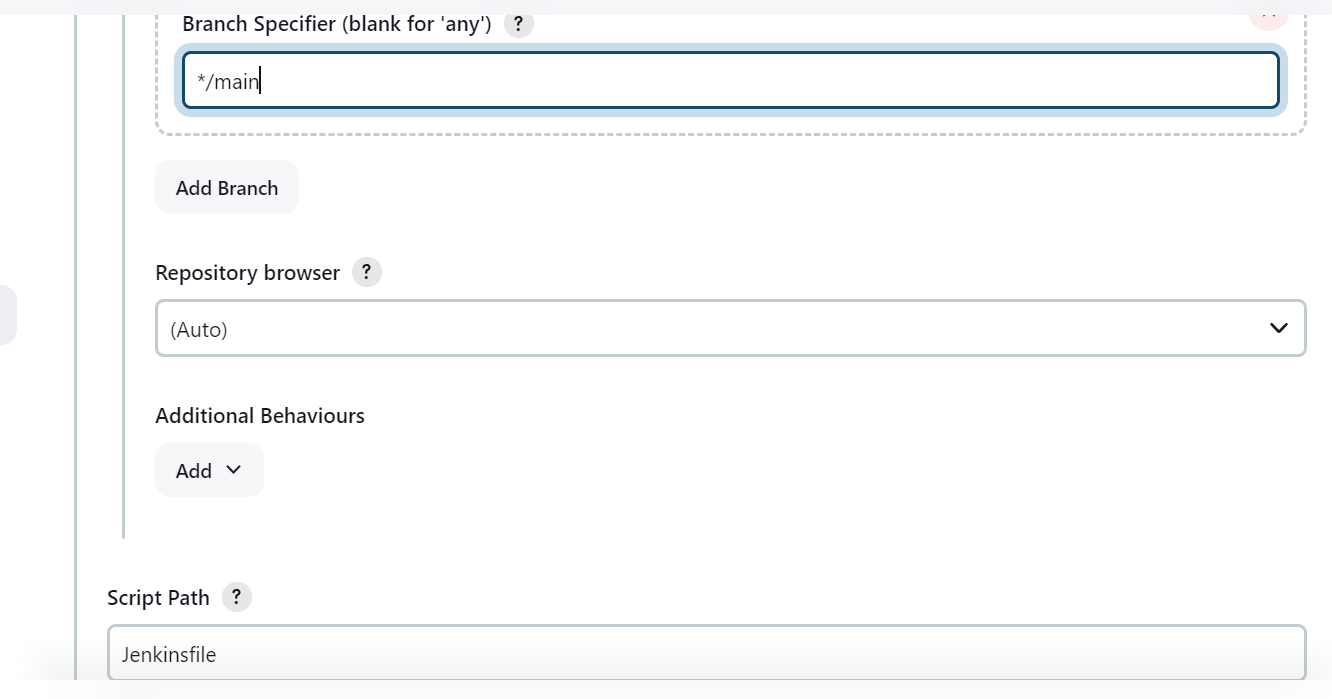
give a name and click on pipeline project
Since we want to automate Build and Deployment whenever developer commits
code, we will use webhooks
Go to your Github repo for which we want deployment
click on settings
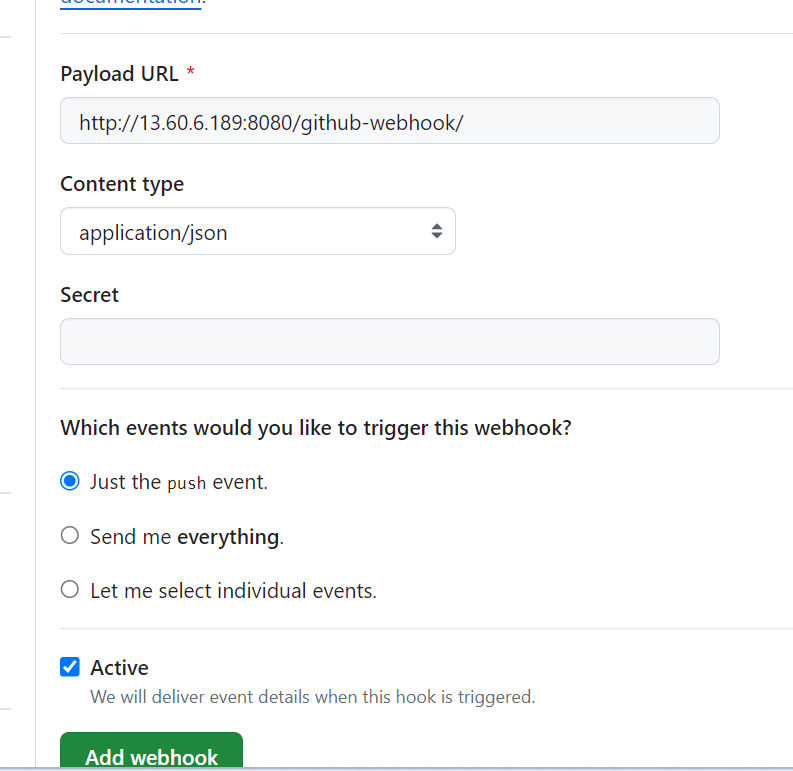
click on Webhooks and add Webhook
Add http://{AWS_EC2_Public_ip}:8080/github-webhook/ , here AWS EC2 Public
IP refers to server in which Jenkins is installed
Jenkins will trigger pipeline as we have selected
Github hook trigger for Git scm polling while configuring pipeline
let us test this by making changes in our code,as of now our website
looks like this
if you want to check logs of pipeline
click on number here like #1 or #2
With this Our Build and Deploy Series has been completed
We Will Discuss more on DevOps topics as part of DevOps mini concepts,
since i will be using the same project everywhere
I Post most of my content in Telugu related to contrafactums(changing lyrics to original songs),fun vlogs, Travel stories and much more to explore, You can use this link as single point of link to access - Sagar Kakkala One Stop
🖊feedback,queries and suggestions about blog are welcome in the
comments.


Comments
Post a Comment